Places 2 Visit

Showing posts with label bamboo. Show all posts

Monday, August 30, 2010

Our Home Update- The Majestic-again

Your wish is my command...;)
No more than a few hours ago I was wishing to see the flooring and here they are. 
As you can see the men are busy at work laying down the flooring.


This is the Foyer. OMG it looks great!
Ok, back to kitchen


This is the garage door. Hell even that looks good.


This is in the master bed room and I already have plans for this little corner.


Everything is coming along so well. 


Well sorta of I have not seen my screen door yet? 


Thursday, July 15, 2010

A Good Day


Today has been a good day. 
My kids have returned from the mid-west. They visit they're dad on summer breaks...and today is also the first time they have seen their new rooms with all the bells and whistles...It was great to hear Mykala scream...

 "I LOVE MY ROOM...THANKS MOM!!!" 
and My son yelled I got a new AIRSOFT Gun COOL!...LOL...


Anywho, today as I waited for them to fly in; 
I decided to paint this old bamboo table that I purchased at Goodwill 4 years ago, 


I think it turned out nice. 

Its in foyer, and I plan on doing a lot more editing to this room.
in the mean time let me tell you a little about the items
that Asian statue was once gold. EWW

So, I sprayed painted it red. 
The item in the middle is just another Asian motif they we inherited with our move,
and the two vases are paper mache vases that I made....
I know blah, blah...but all in do time.
No rush....
Thanks for stopping by!
Tomingo

Sunday, June 20, 2010

The Majestic....Our Home


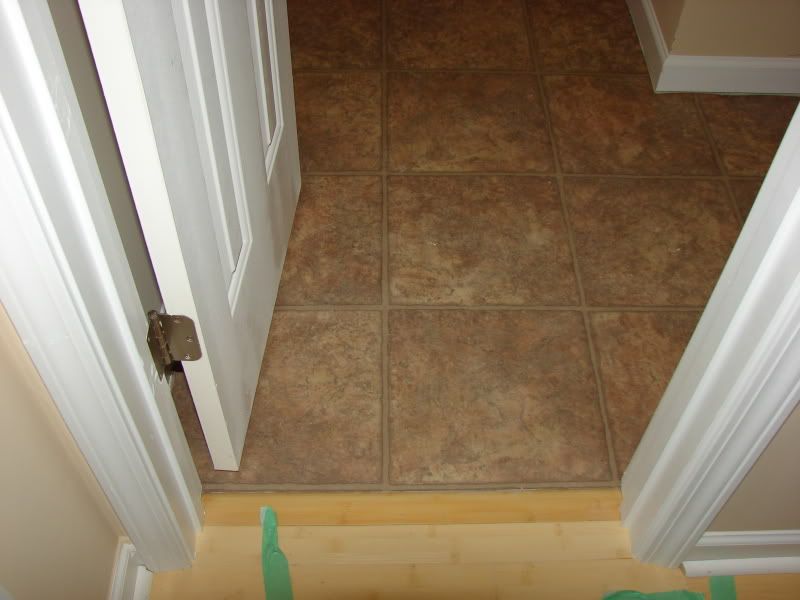
This is the foyer/ downstairs bathroom floor...

Downstairs Bathroom


Looking out the master bedroom to the loft area


an empty wall area in the master bed room, I know exactly what I will be placing here!

The Kitchen Flooring. I am so glad we chose the upgrade.
Again Thanks for stopping by!


Wednesday, May 19, 2010

Bamboo and Tile Photo Display


Tools and Materials: 
10 pieces of 7”x7” raw slate 
10 photos printed onto vellum paper (semi transparent paper)
industrial-strength spray glue
clear polyurethane spray
three wood dowels for trim
twine
3-inch screws
two dark bamboo rods (3”x6’)
drill with a masonry bit
hot glue gun and glue sticks
Figure A
Steps: 
1. Cut prints into 5”x5” squares (figure A).

2. Drill a small hole on the top of each piece of slate.
3. Attach photos to the center of the slate squares using spray glue. Press gently to secure.
4. Spray finished piece with clear polyurethane.
Figure B
5. Use hot glue to frame out each picture with wood dowels.
6. Run the twine through hole and secure with a strong knot (figure B). Leave enough slack to tie to the bamboo.
7. Drill evenly spaced holes in the bamboo rods. Thread the twine through the holes and knot.
8. Secure entire piece to wall studs.


Photobucket

Bamboo-Covered Bench- how to


HGTV 
Materials and Tools:
one box of bamboo flooring
construction adhesive and wood glue 
one sheet medium-density fiberboard (MDF) 
- cut one top piece 
- cut two sides the length of the bench
- cut two sides the width of the bench
one sheet MDF for the legs
two 1x4 pine boards
table saw and miter saw
trowel, screw gun and nail gun
Steps:
1. Assemble the top of the bench by gluing and screwing the MDF pieces together to form a hollow box.
2. Cut two pieces of the 1x4 pine to the length of bench. Attach them to the underside of the box for support. Cut smaller pieces to sandwich in between the boards and hold the legs in place.
3. To create the legs, cut down four strips MDF and nail them together into a square leg. Repeat to build five legs.
4. Attach the legs to the underside of the bench.
5. Cut the bamboo planks to fit across top. Use a miter saw to cut the edge pieces at 45 degree angles.
6. Spread adhesive over MDF and set bamboo pieces in place interlocking each piece tightly.
Photobucket

Quotes

Show me someone who never makes a mistake and I'll show you someone who never does anything.